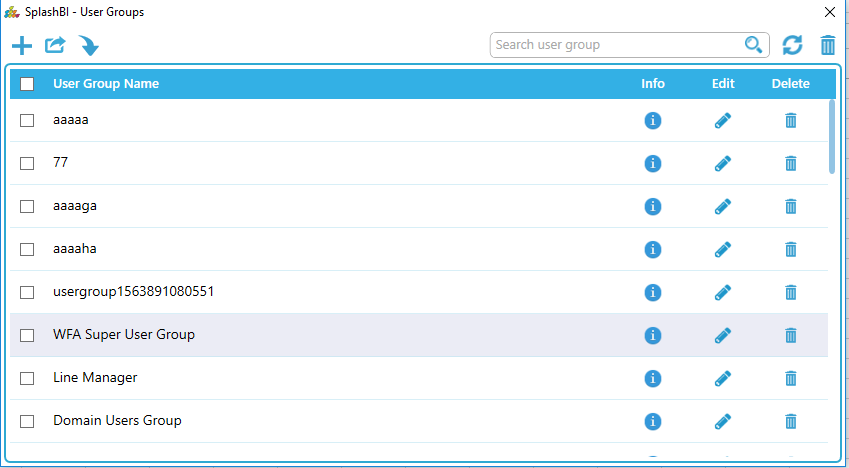
The User Groups screen will show the list of all the User Groups created.
Create Group:
1)Click plus button to create a user group, it is mandatory to provide a name. The user group name must be unique.
2)The user can also select all users or particular users in the organization from the available users list to the current user group.
3) The left/right arrows will either add or remove users from the user group list.
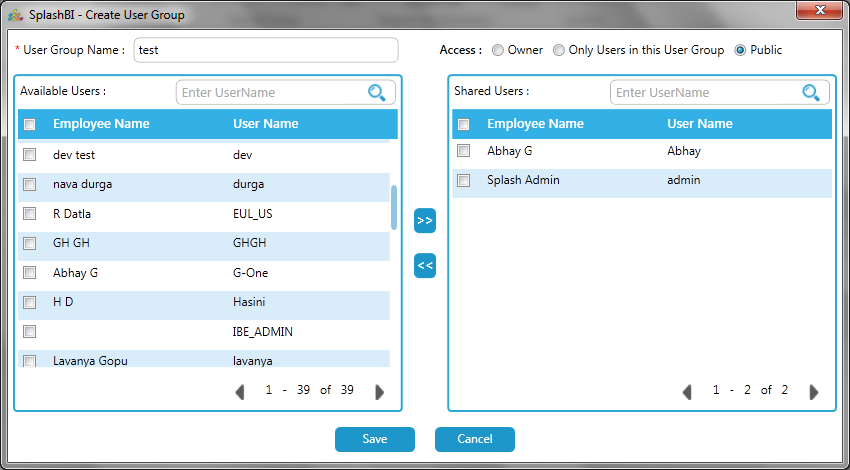
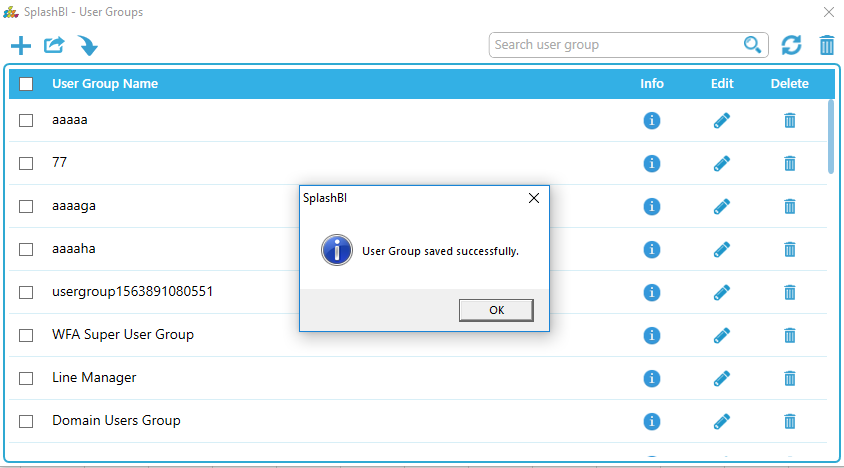
4) To save a new user group, click on the save button. If the user group is created successfully, the user will see a pop up confirmation
Edit User Group:
1)SplashBI Excel Connect allows users to edit the created user groups at anytime, and changes will reflect automatically after saving.
2)
The user
group can be edited at any time by
clicking on the
Edit
 icon.
icon.
3) Once in edit mode, a pop up window will appear to add users, delete users, or edit the group name.
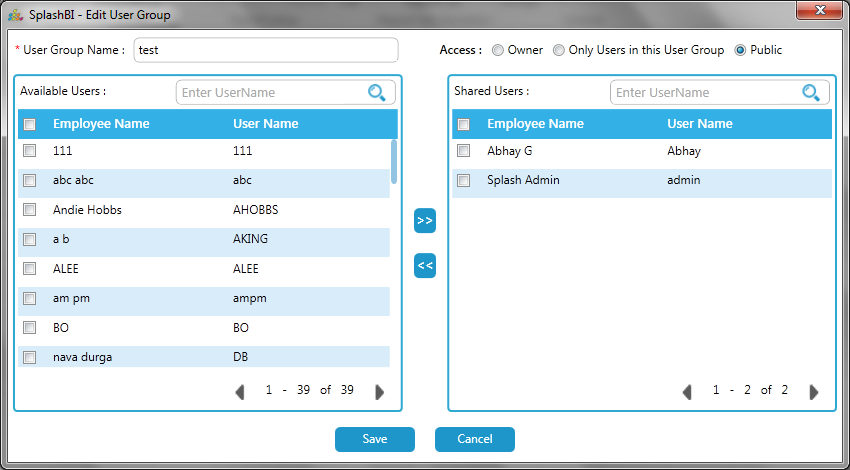
4)T he access of the user group can be changed by reselecting the radio buttons of access.
5) Now click on the save button after making the necessary changes.
6) The user will receive a success message upon the changes.
Export User Group:
U ser can export the user group by clicking on the export icon.The below screen appears when clicked on export button.
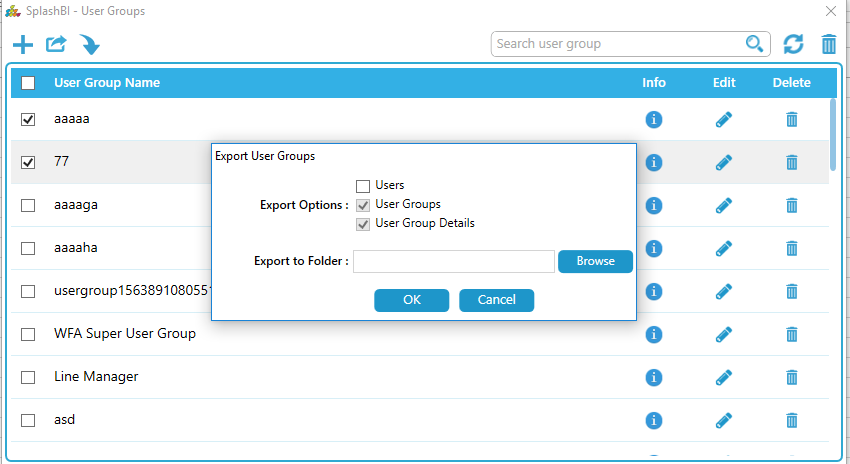
After clicking on OK button a successful message confirms the exporting of user group.
Import User Group:
U ser can export the user group by clicking on the import icon.The below screen appears when clicked on import button.
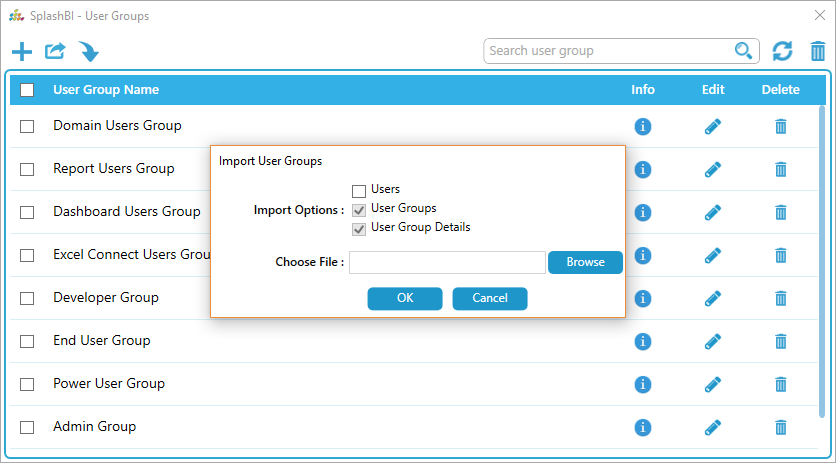
After clicking on OK button a successful message confirms the importing of user group.
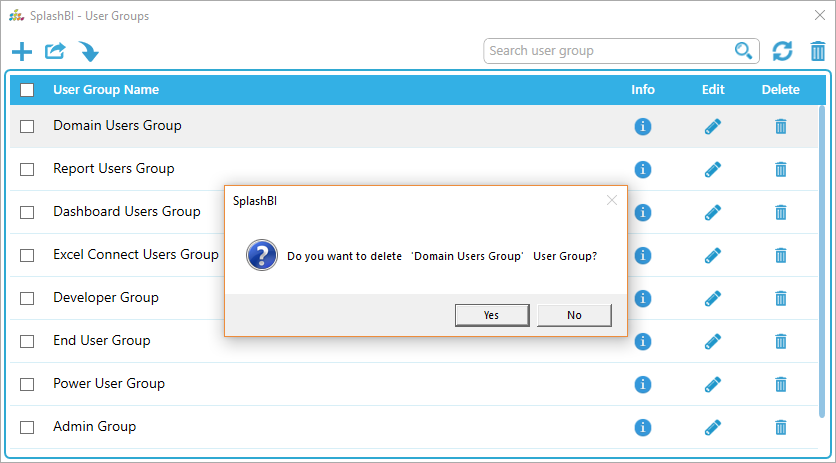
Delete User Group:
U ser can delete the user group by clicking on the delete button of that group , which can be seen in below screen.
 .
.
After clicking on Yes button a successful message confirms the delete of user group.
User Group Info:
 .
.
By clicking on Info icon we can see users belongs to that usergroup.
 .
.