The SplashBI Excel Connect reports and report sets offer end users a way to collaborate with other colleagues and groups using the share functionality. Any user with whom you share your report(s) or report sets can access them online live from anywhere any time.
Advantages to SplashBI Excel Connect Reports Online Sharing:
• Users can share any data or report(s) or report sets to any users or group.
• Access On-line: Users can access the shared views online from in Reports anytime and anywhere.
Reports can be shared by the following way:
° By selecting the 'Share' option from the action drop down of any report, the user is able to share the particular report to specific users or user groups.
Steps to share report:
Step 1: Reports
Click the desired reports to share in Report tab.
Step 2: Share
• Select the 'Share' icon from the actions drop down in the reports tab.
• When the user clicks on the share icon, it launches the Share Report pop up window.
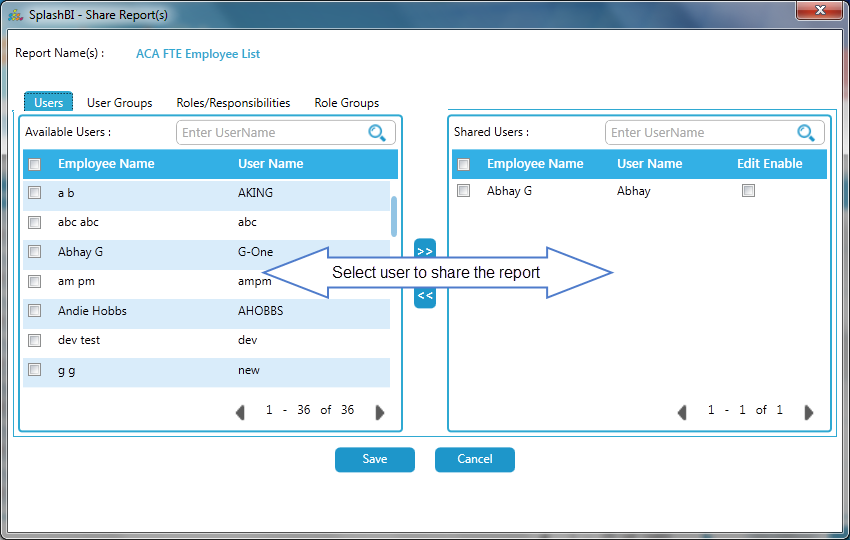
Step 3: Select Users
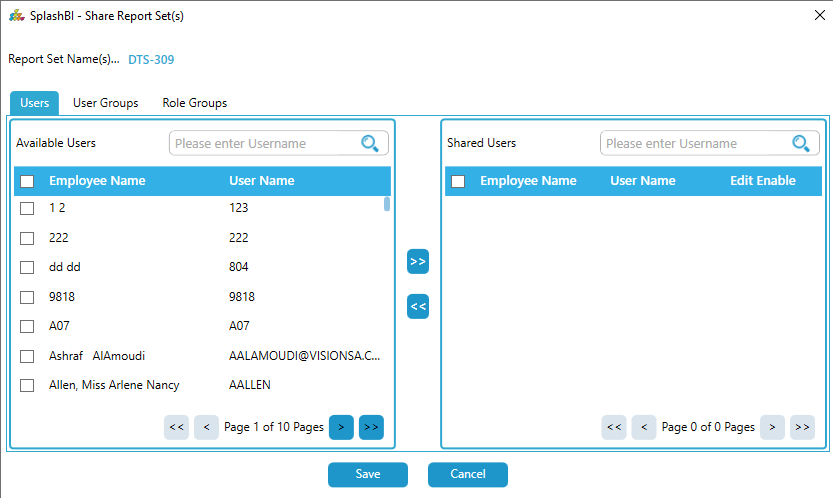
•Click the users names from the available users section, and click the "greater than" arrow to move users over for sharing.
•The end user will notice that Enable is checked, which indicates the users in the list will have access to the reports data and can copy the report if they choose to make any changes for their own personal use.
Step 4: Save Users
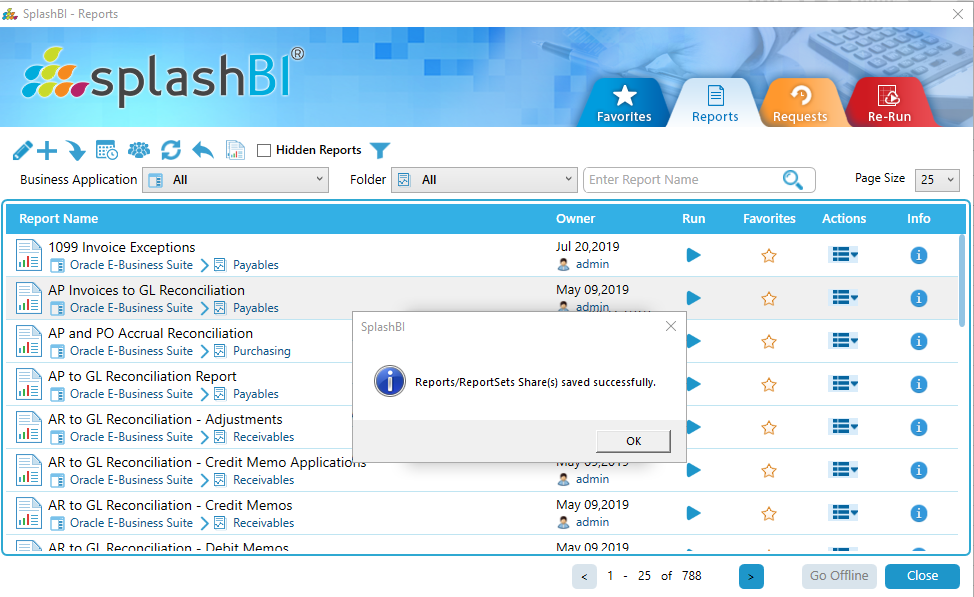
• Click the Save button.
• A confirmation will pop up indicating the report was shared successfully, just click OK.
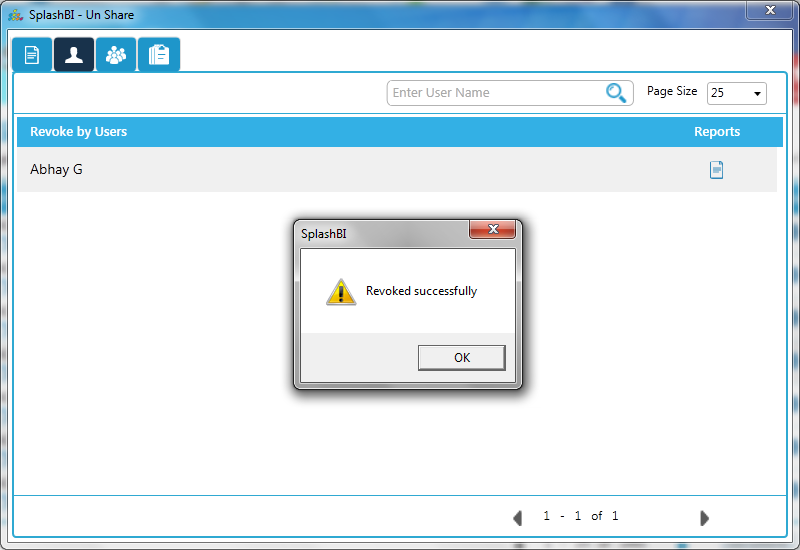
Step 5: Remove shared users.
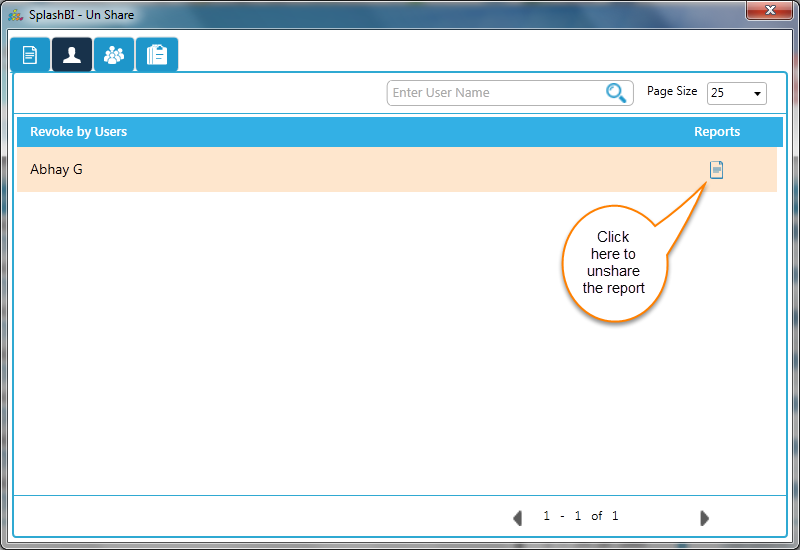
•End users can also remove users from the shared functionality.
•Go to the Users tab and Click on the unshare button for unsharing the report for the user.
Step 6: Save Removed Users
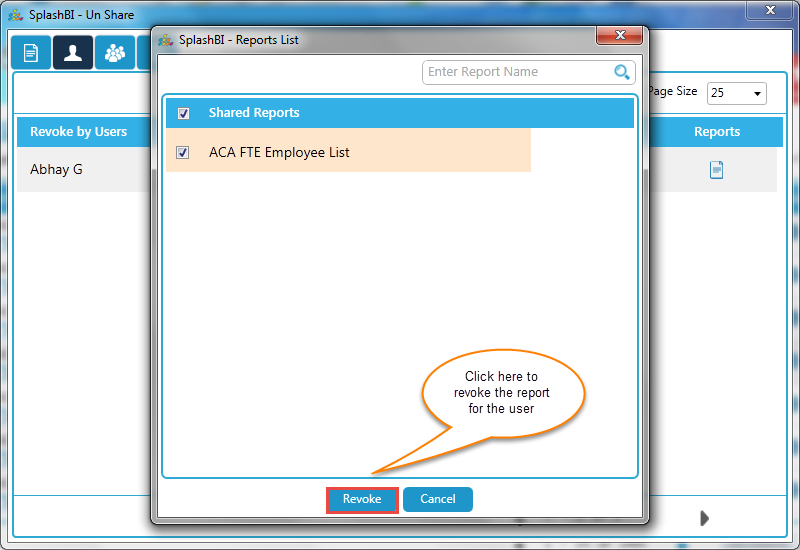
•Click on the revoke button for unsharing the report .
•A confirmation will pop up indicating the report was revoked successfully, and just click OK.
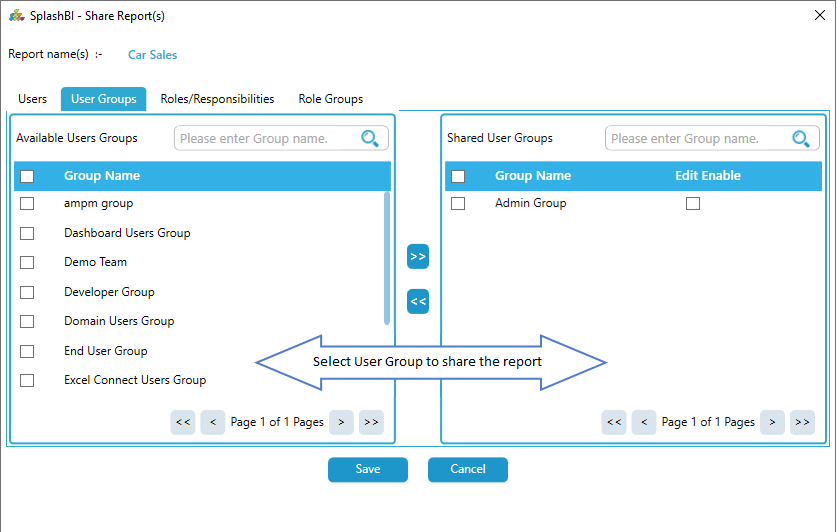
Step 3a: Share User Groups
•Click the 'Share' icon from actions drop down in reports tab.
•When the user clicks on the share icon, it launches the Share Report pop up window.
Step 4a: Select User Groups
•Click the User Groups from the available groups section, and click the greater than arrow to move user groups over for sharing.
•The end user will notice that the Edit Enable box is checked, which indicates that the user group in the list will have access to the reports data, as well as the ability to edit the shared report.
•To remove the ability to edit the shared custom report, un-check the box and click left arrow.
Step 5a: Save Shared User Groups
• A confirmation will pop up indicating the report was shared successfully, and just click OK.
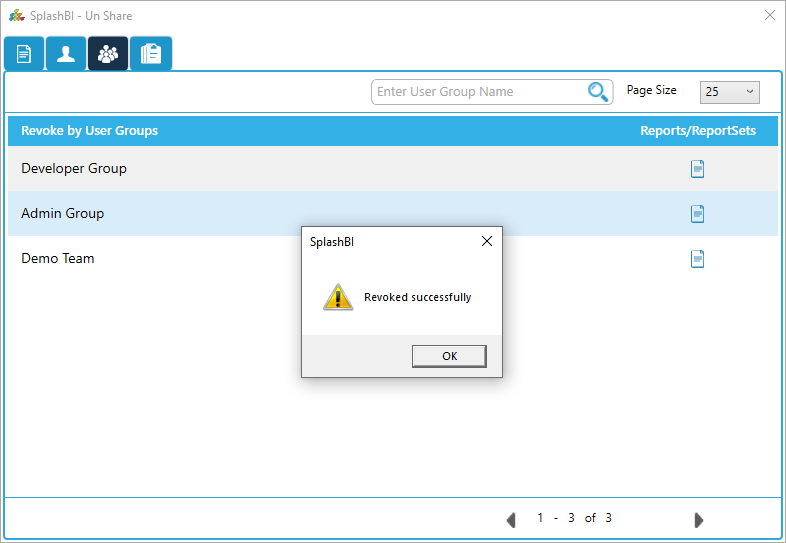
Step 6a: Remove User Groups
•End users can also remove user groups by clicking on the unshare icon in edit icon.
•Go to Revoke by user group and click the unshare button.
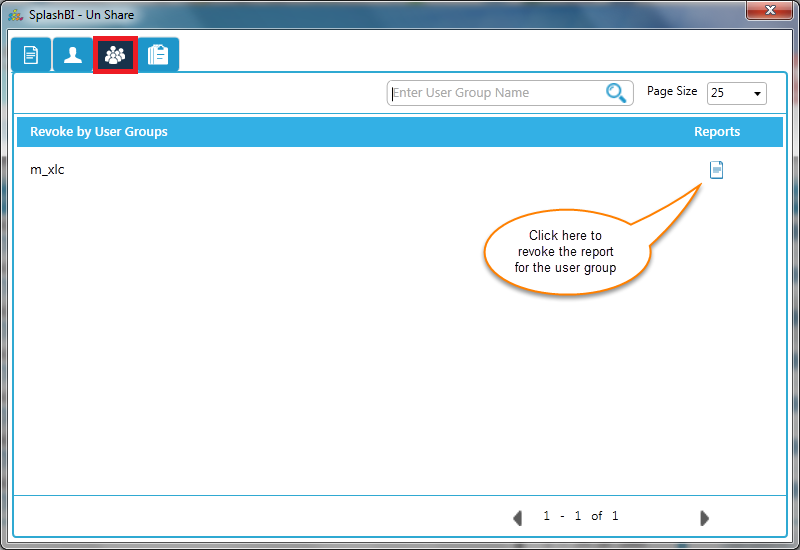
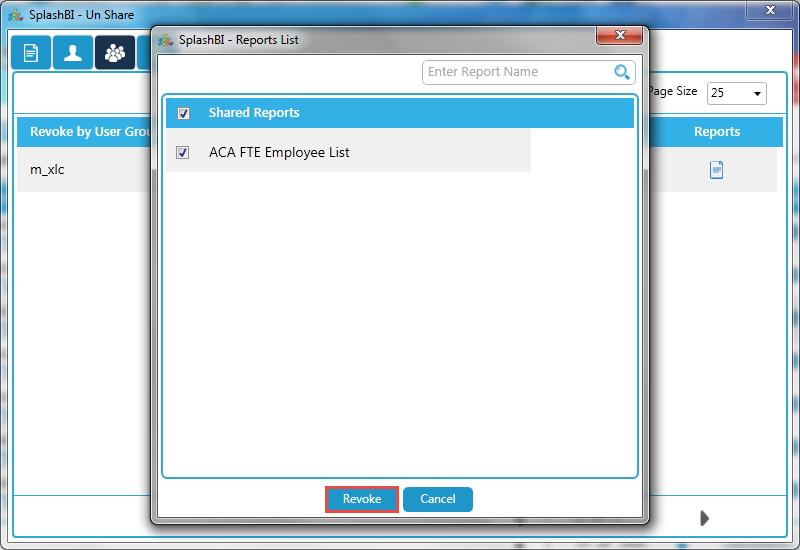
In that section, a window is poped up , now select the required reports from the available reports and click on revoke button for unsharing the user group for the report.
Now a confirmation is poped indicating the report was revoked successfully, and just click OK.
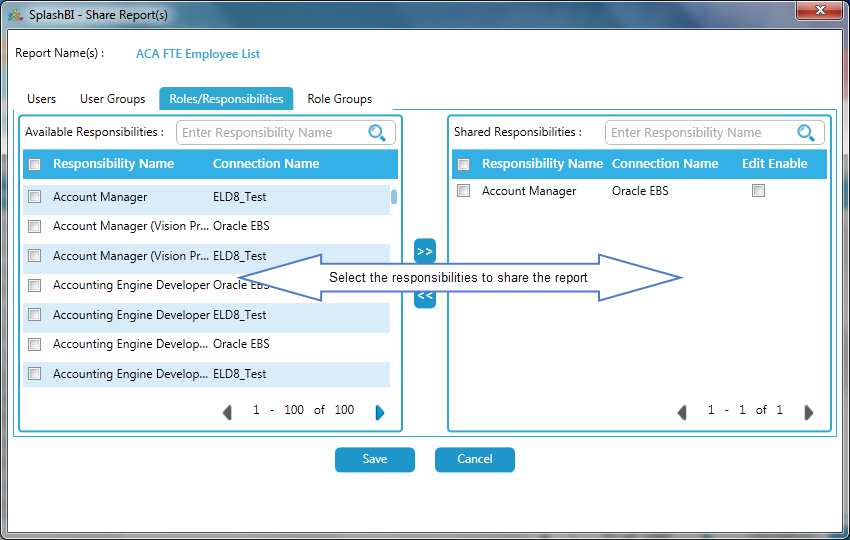
Step 7: Select Responsibilities:
•Click the Responsibilities from the available responsibilities section, and click the greater than arrow to move responsibilities over for sharing.
•To remove the responsibilities, check the responsibilities that is shared and click on lesser than arrow to unshare.
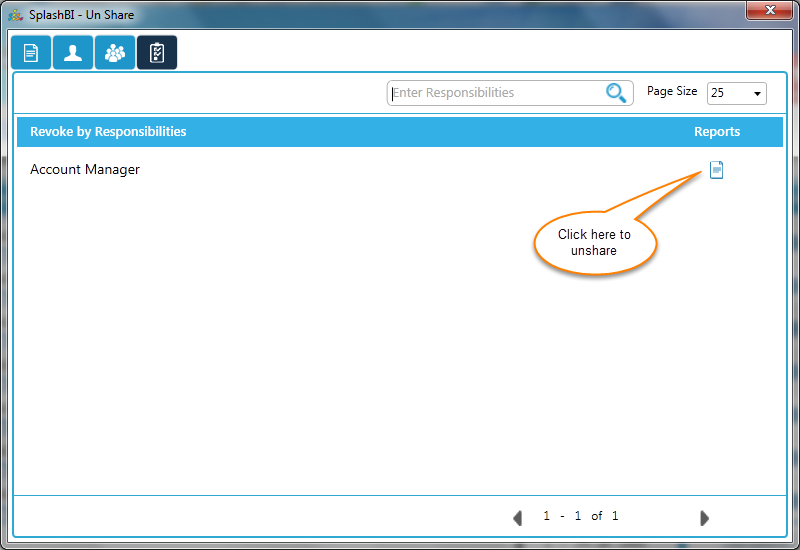
Step 7a: Remove Responsibilities
•End users can also remove reponsibilities by clicking on the unshare icon in edit icon.
•Go to Revoke by responsibilities tab and click the unshare button.
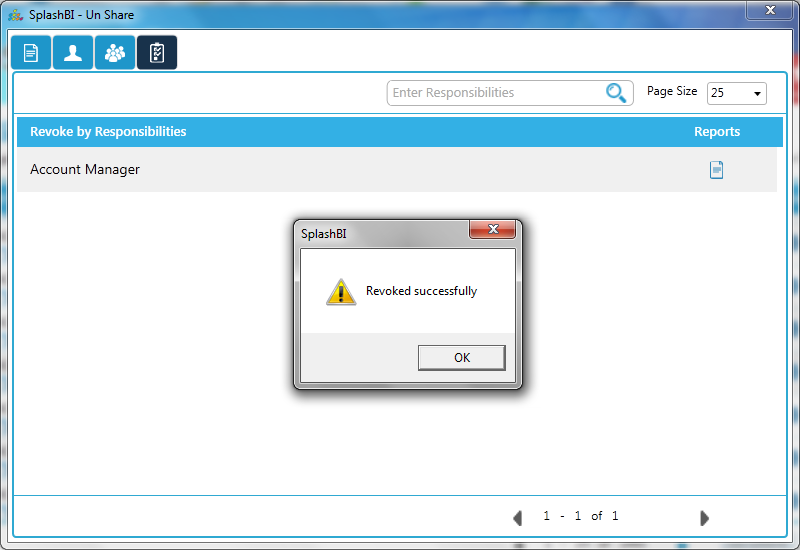
In that section, a window is poped up , now select the required reports from the available reports and click on revoke button for unsharing the responsibilities for the report.
Now a confirmation is poped indicating the report was revoked successfully, and just click OK.
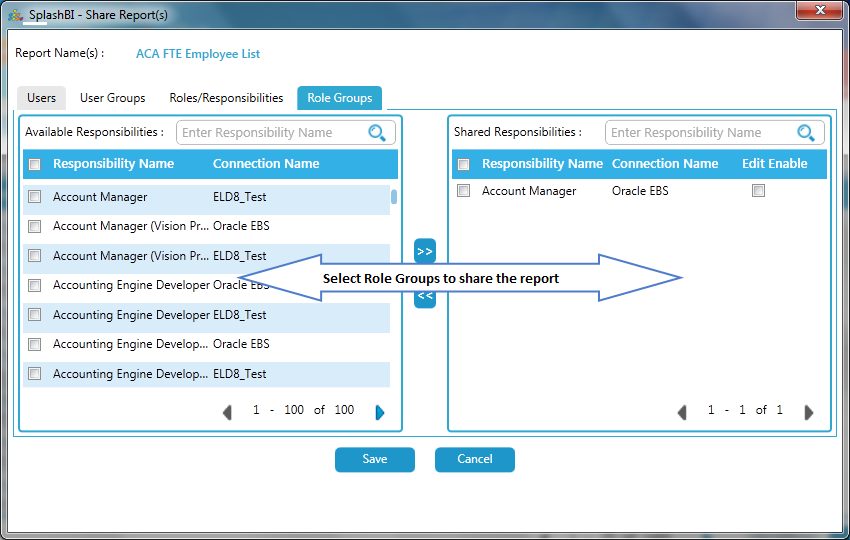
Step 8: Select Role Groups:
•Click the Role Groups from the available role groups section, and click the greater than arrow to move role groups over for sharing.
•To remove the role groups, check the role groups that is shared and click on lesser than arrow to unshare.
Step 8a: Remove Role Groups
•End users can also remove role groups by clicking on the unshare icon in edit icon.
•Go to Revoke by role groups tab and click the unshare button.

In that section, a window is poped up , now select the required reports from the available reports and click on revoke button for unsharing the role groups for the report.
Now a confirmation is poped indicating the report was revoked successfully, and just click OK.

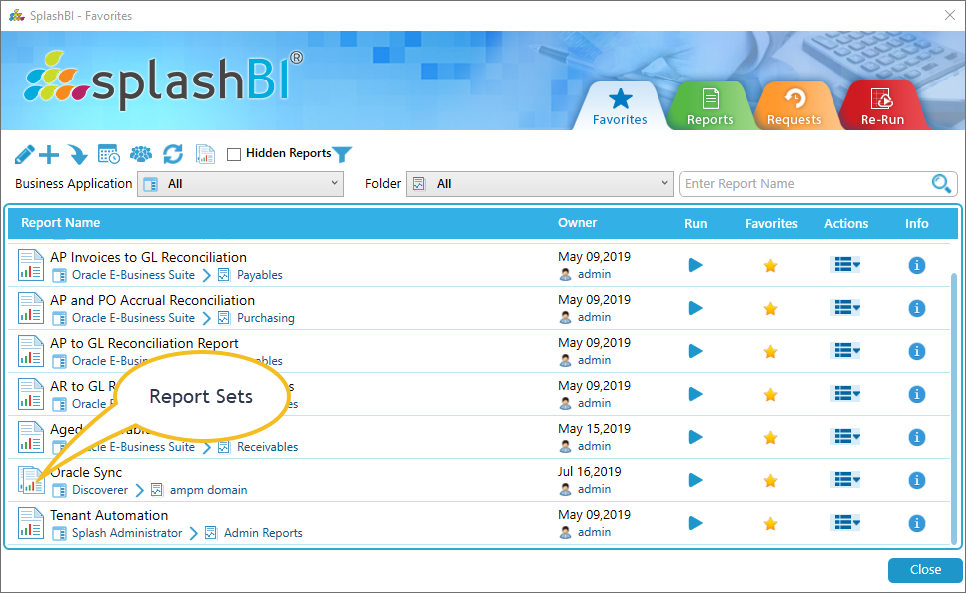
Share Report Sets:
The Report sets can be shared same like reports sharing.Please follow the above steps for sharing of Report sets.
UnShare Report Sets:
The Report sets can be unshared same like unsharing of reports.Please follow above steps for unsharing the report sets.
Share Report &Report Sets:
The SplashBI Excel Connect provides the user to share the reports & report sets at a time.The process of sharing report & reports sets at a time is same like sharing reports.Please follow the steps of sharing report for sharing report & report sets at a time.The below screen will pop up when selected report and report sets for sharing.
UnShare Report &Report Sets:
The report & report sets can be unshared same like unsharing of reports & report sets separately.Please follow above steps for unsharing the report & report sets .