IFrame Embed
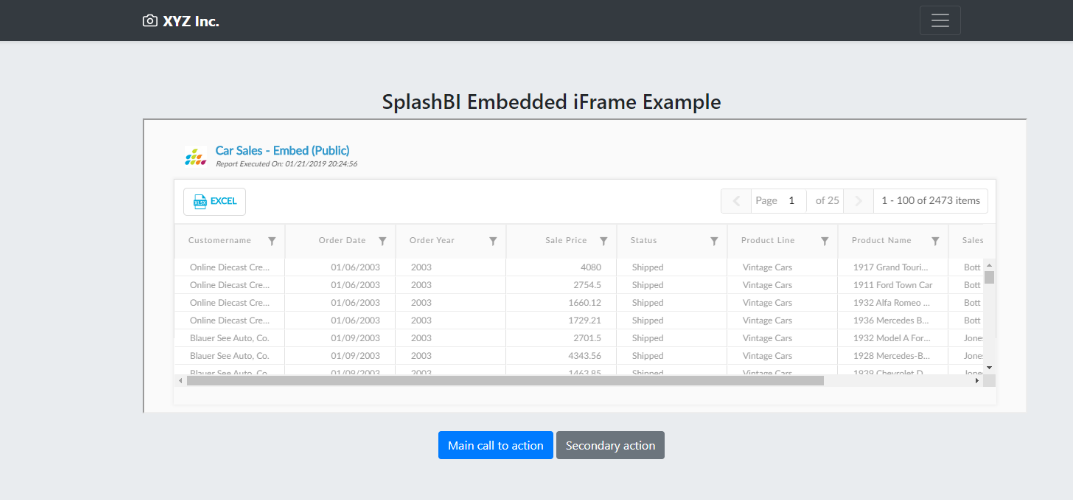
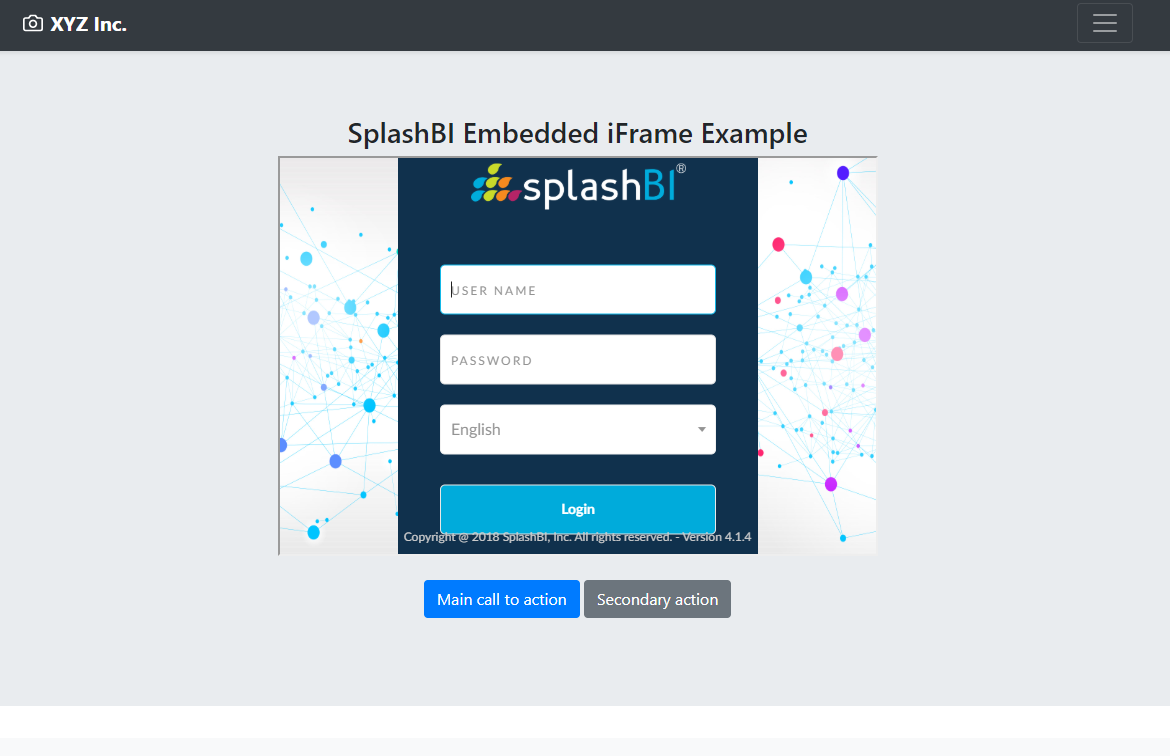
Create an embeddable iFrame from report and use the code snippet in other HTML applications to render the report, below example shows the report.
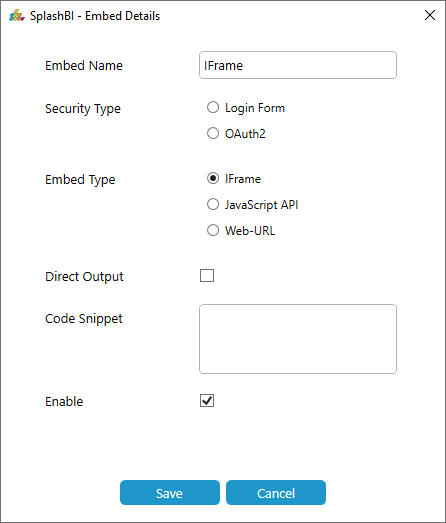
1.Enter the embed name.
2.Select IFrame as the option.
3.Check Direct Output to produce reports with default values, if you wish to alter the values un-check the Direct Output option. This will re-direct
you to the report submission page.
4.Click Save.
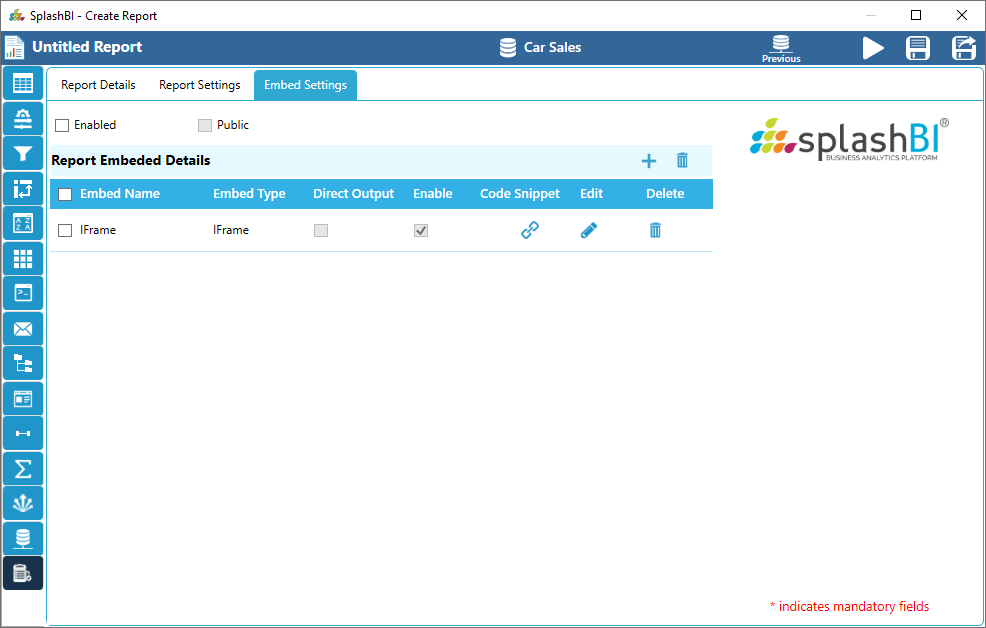
5.You will be redirected to the Embed Settings page.
6.Click Save. Go back to settings and click on Code Snippet.
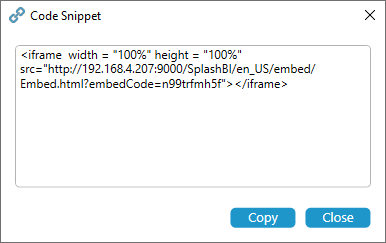
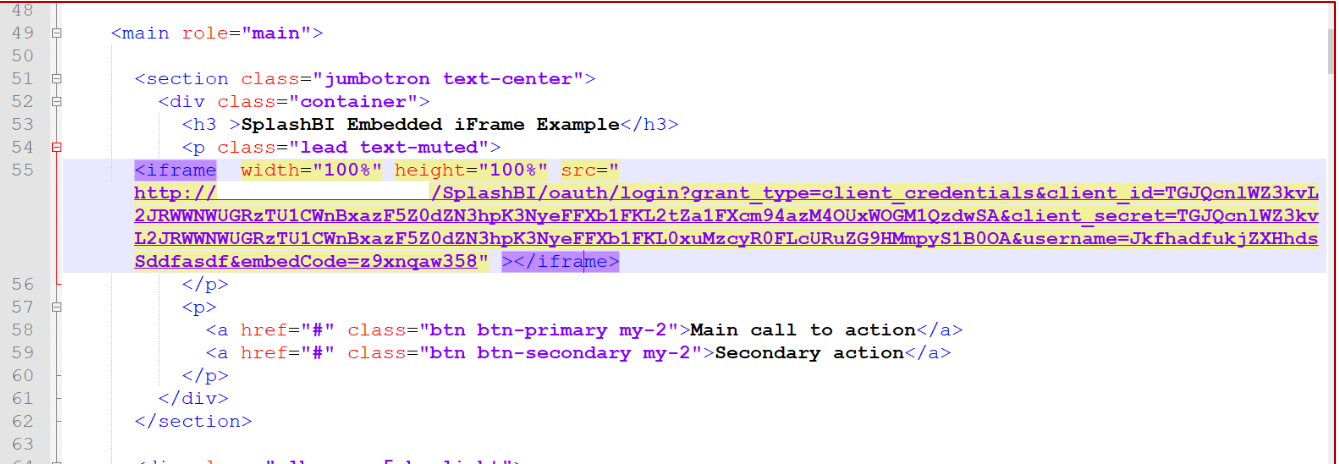
Embed the iFrame code snippet in Client Application HTML page, example HTML code snippet is show below.

Paste the URL copied in clip board. :
Security Options
Login Form
Here, the user has to use the user name and password as the credentials to login to the application before they can view the report.
The rest of the process for creating the embed application is same as above. When the user pastes the URL in the address bar of the browser, they will be re-directed to a login page as shown below. :
Login screen shows up, login using SplashBI user name.
OAuth2 To know more about OAuth2 security creation refer OAuth2 Settings. Selecting this security option will enable a security wall that requires an OAuth2 security access for the user to view the report.
Save the embed settings as described above and copy the code snippet.
1. [REPLACE WITH CLIENT_ID] with Client_ID (eg:TGJQcnlWZ3kvL2JRWWNWUGRzTU1CWnBxazF5Z0dZN3hpK3NyeFFXb1FKL2tZa1FXcm94azM4OUxWOGM1QzdwSA)
2. [REPLACE WITH CLIENT_SECRET] with Client_Secret (eg:TGJQcnlWZ3kvL2JRWWNWUGRzTU1CWnBxazF5Z0dZN3hpK3NyeFFXb1FKL0xuMzcyR0FLcURuZG9HMmpyS1B0OA)
3. [REPLACE WITH BASE64(USERNAME:::CLIENT_ID)] (eg:BASE64(admin::: TGJQcnlWZ3kvL2JRWWNWUGRzTU1CWnBxazF5Z0dZN3hpK3NyeFFXb1FKL0xuMzcyR0FLcURuZG9HMmpyS1B0OA))
with the string formed by combining username, ‘:::’ and Client_Id and converting that into Base 64.Embed the code in the HTML page.
Paste the URL copied in clip board.
3)Now if you want to upload and share for another user click on next button which can be seen in below screen.
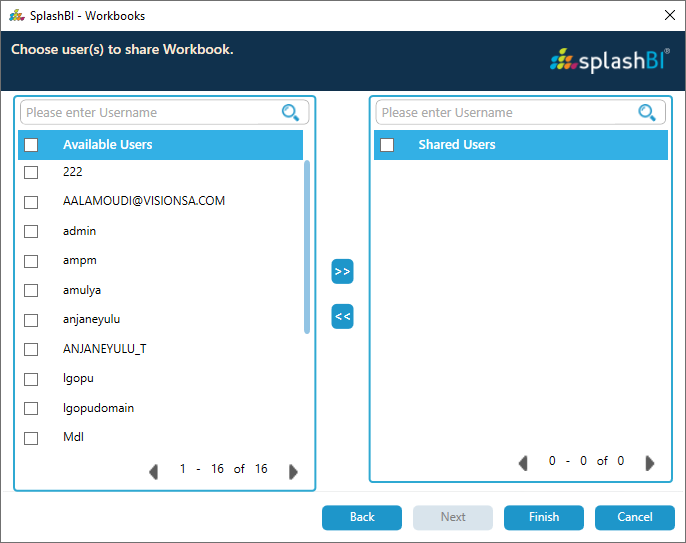
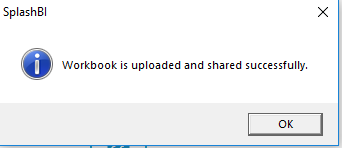
4)From the below screen select a user and click on finish button.A confirmation will pop up indicating successfull upload and share of Workbook.
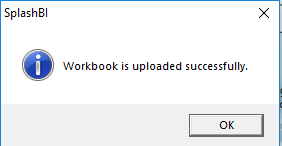
5)If want to just upload the Workbook click on finish button.A confirmation will pop up indicating successfull upload of Workbook.
Current WorkBook :
1)SplashBI Excel Connect provided the user to upload and share the Current Workbook as Workbook.
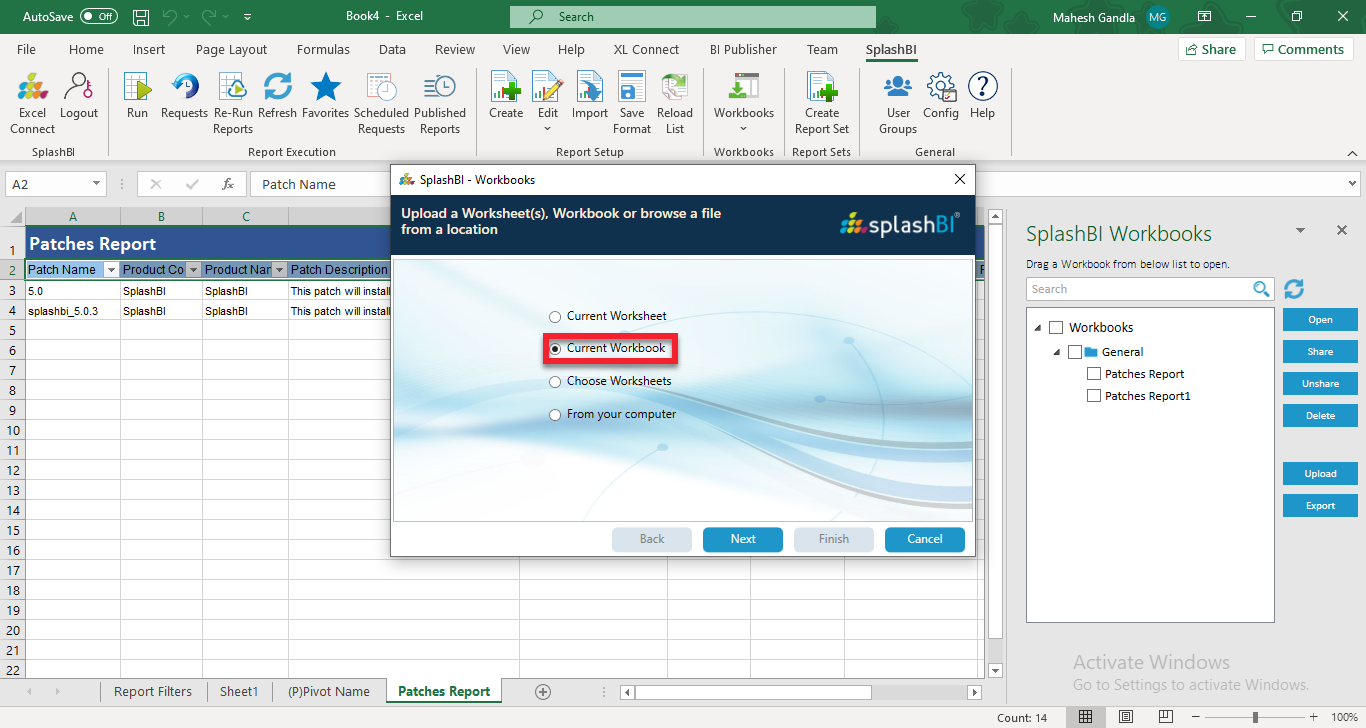
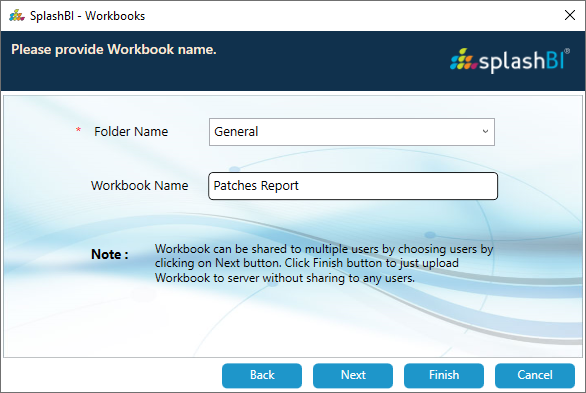
2)To upload and share Current WorkBook, select Current Workbook option and click on next button where you need to give the Workbook name.
3)Now if you want to upload and share for another user click on next button which can be seen in below screen
4)From the below screen select a user and click on finish button.A confirmation will pop up indicating successfull upload and share of Workbook.
5)If you want to just upload the Workbook click on finish button.A confirmation will pop up indicating successfull upload of Workbook.
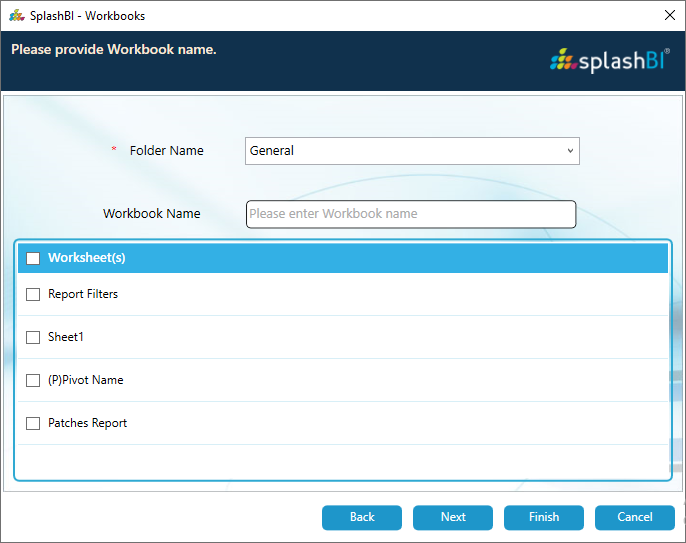
WorkSheets :
1)With the Worksheets option you can select the desired worksheets to upload and share.
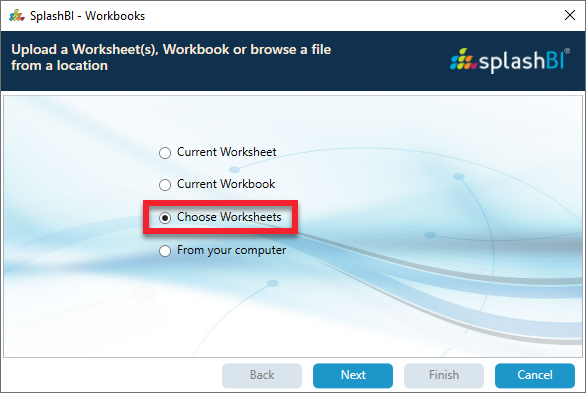
2)To upload and share selected Worksheets , click on next button where you need to give the Workbook name.
3)Now if you want to upload and share for another user click on next button which can be seen in below screen
4)From the below screen select a user and click on finish button.A confirmation will pop up indicating successfull upload and share of Workbook.
5)If want to just upload the Workbook click on finish button.A confirmation will pop up indicating successfull upload of Workbook.
From Computer :
1)With From Computer option you can browse to desired workbook which saved on your PC and can upload and share. We can upload only Excel Workbooks.
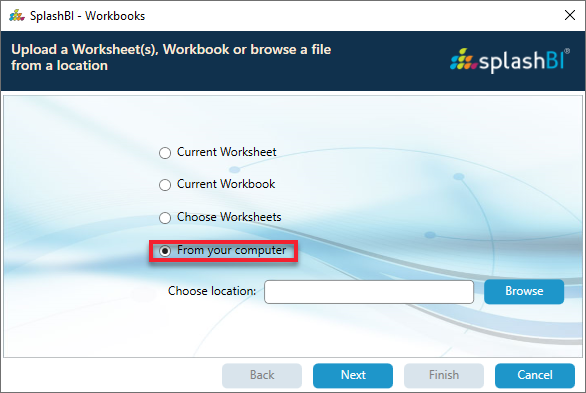
2)To upload and share selected Worksheets , click on browse and go to the location of the file which you want to upload.

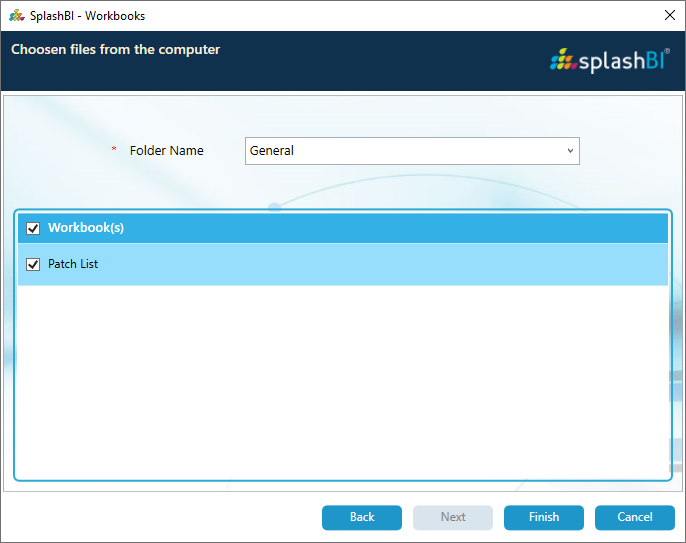
3)Now select the worksheet you want to upload and click on finish
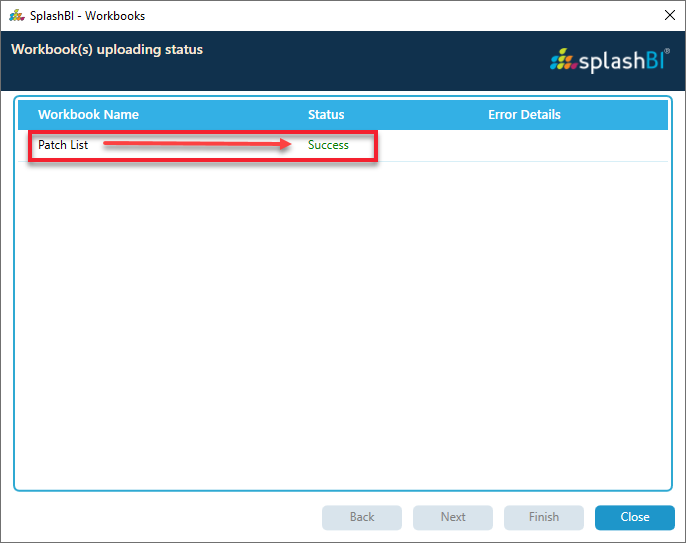
4)After clicking on finish you will directed to next window shwoing the success of the of the upload as shown in below screen .
Export Workbooks : :
1) By Using this option, User can export selected workbooks to selected location.
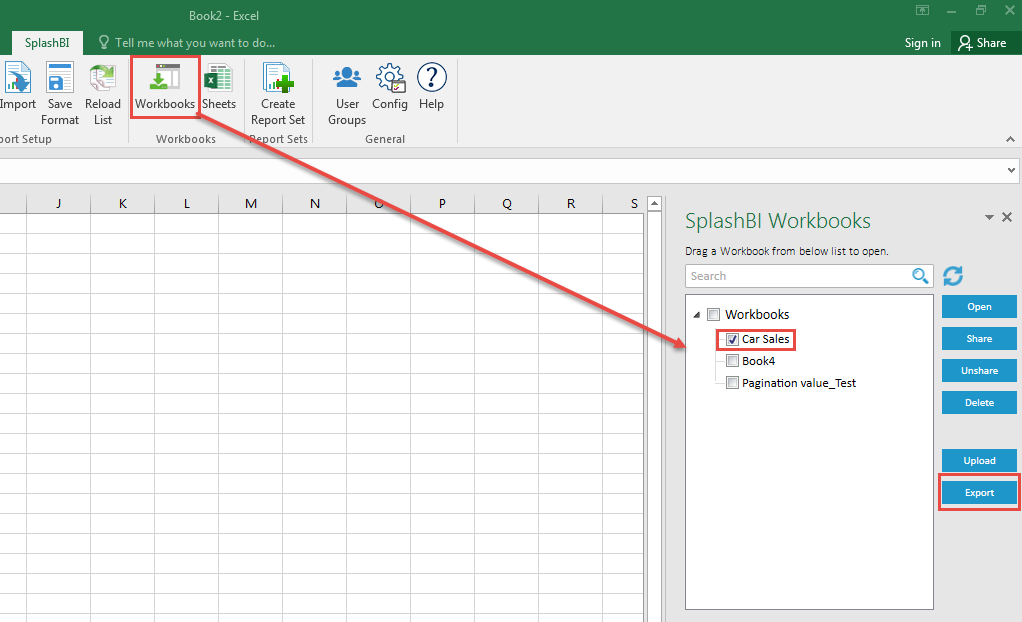
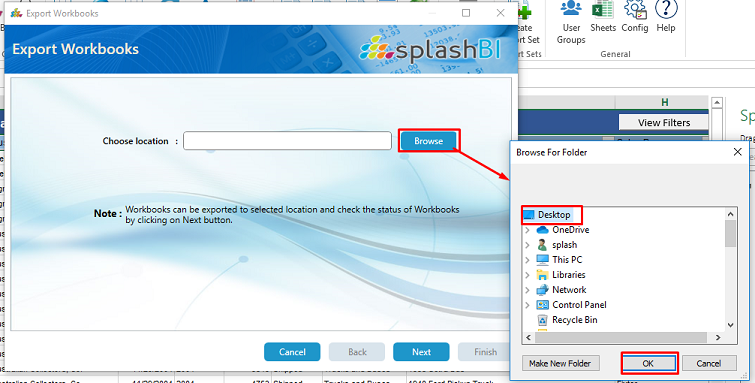
2) By clicking on next, User can select the desired location in the system where user wants to export the workbooks.
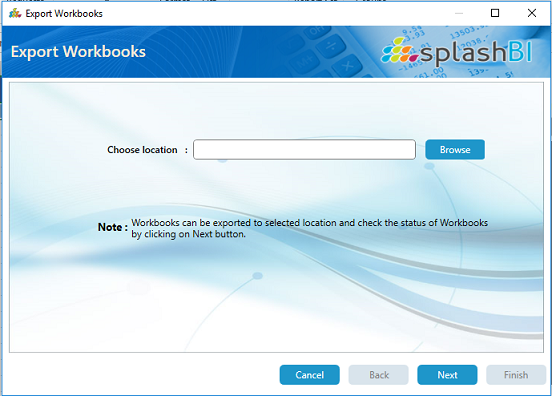
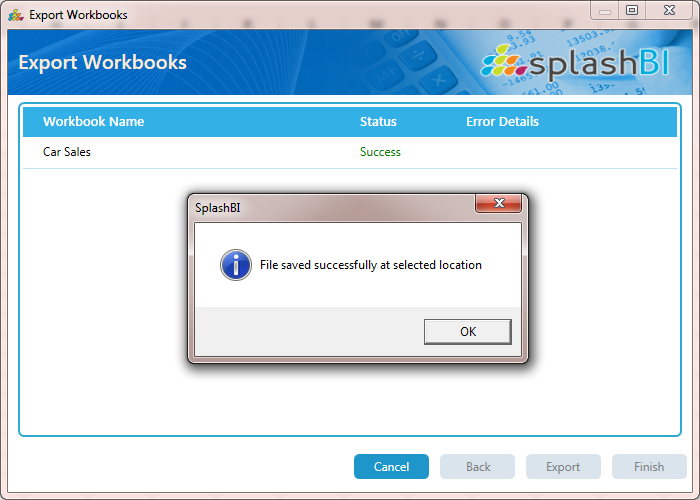
3) By clicking on export button, Workbook files will be saved at the desired location.

4) By clicking on finish button, success message will be popped up on the screen as below
2. Sheets:-
This option is to delete and toggle between the sheets. For more details please click here
3. Migrate Workbooks:- This option is to convert Expess XLC workbooks to SplashBI Excel Connect workbooks. For more details please click here