1. Click on SplashBI Menu -> Login in Excel Sheet. It will Pop-up a Create new Connection window to setup SplashBI Instnace as shown below.
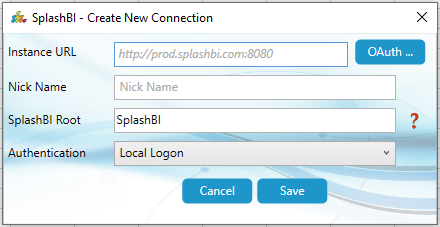
2. Provide details in the respective text box fields.
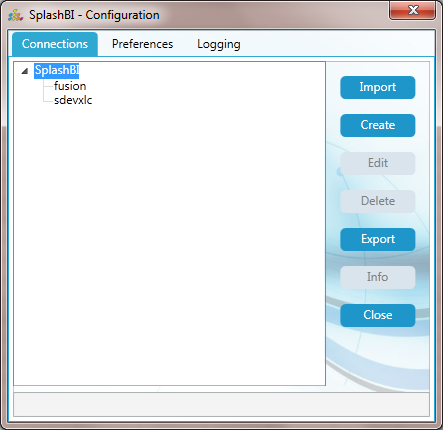
Import : It will import configuration settings from the server.
1. Click on SplashBI Menu -> Login in Excel Sheet. It will Pop-up an Import Settings window to download SplashBI Excel Connect configuration settings when you connect to SplashBI for the first time.Enter the instance URL with port number and press enter as shown in below figure.
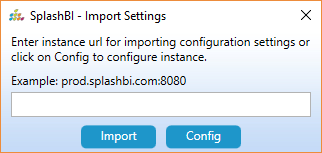
2. Provide an Instance URL where the SplashBI is configured.Instance URL contains Host name and port number.Click on OK button to download configuration settings.After successful download of configuration settings SplashBI shows all the instances configured for SplashBI as follows.If there is no configuration file in the server it will Pop-up with a message Configuration settings not found.
Create : To add new instance details to the existing list.
Edit : To edit existing instance details to the existing list
Delete : To remove the existing instance,select the instance and click on delete button.
Export : To export all configuration settings from the computer to an XML file which can be moved to the server.This enables you to automate the configuration process throw the Import option.
Info : By clicking on the info button you can find SplashBI Excel Connect help file.
Close : To close the window click on close button.
Authentication : Click on dropdown to select the authentication type for the instance.

4.If you want to select OAuth as the authentication, then you can click on OAuth... button to upload Instance details (or) you can enter manually. Connection window can be seen as below
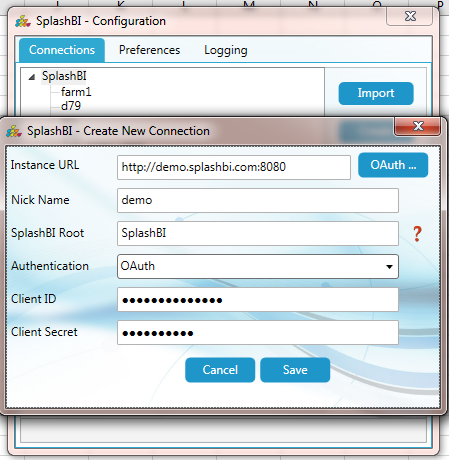
5.Provide all the fields including Client ID and Client Secret.If you want to save the details and you can click on save.If alias name already exists it will give a message to replace the existing instance details or not.
6.OAuth can be created by clicking on the OAuth button which pop up the open dialogue to open a configuration xml file for the instance.
NOTE: Instance details should be stored with unique Instance alias name.
7. When some instance details are stored, login window will show you with all Instance alias names in a dropdownlist in the Login window.The last Logged in Instance alias name, the user name are Popped-up automatically.You have to enter password and then connect to the server.Click on SplashBI menu --> Login window is Popped-up as below when clicked on login .
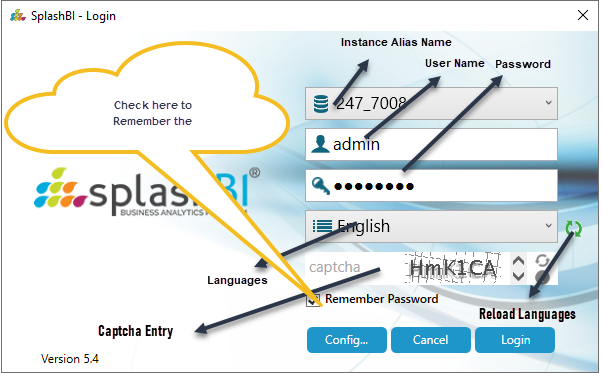
1) Config Button - It naviagtes to the configuration screen.
2) Cancel Button - It closes the login form.
3) Login Button - It Logins to the SplashBI Excel Connect tool if mandatory fields are given correct.If not provides the validations accordingly.
4) Reload Languages Button - It is used to get the latest Languages list from the server.
Configuring Captcha Login
Login to Web application -> Adminstrator -> Settings -> Global Setting -> Enable Captcha -> Set the value to Text.
Now Log out & Login again to get the updated login screen along with Captcha.
Configuring SSO with SAML
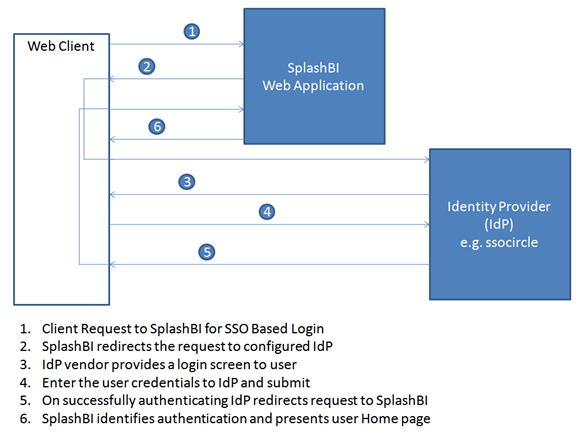
SplashBI Excel Connect supports Single Sign-On (SSO),
a process that allows users to authenticate themselves against an external
Identity Provider (IdP) rather than obtaining and using a separate username and
password handled by SplashBI.
Under the SSO setup, SplashBI can work as a Service Provider (SP)
through SAML (Secure Assertion Mark-up Language) allowing you to provide Single
Sign-On (SSO) services for your domain.
System/Software Requirements
Following is the list of the software that is required for using Splash
BI’s SAML support for SSO (Single Sign-On):
Identity Provider that supports SAML 2. 0 for SSO authentication
Identity Provider that supports the import and export of XML metadata
files.
SplashBI 2.5 or later supports SAML based authentication.
Username in SplashBI and Identity Provider should be the same.
Optionally a X.509 certificate file from any Certificate Authority (CA) or
self- signed (.cert or .crt), and a private key file with .key extension.
Splash BI SSO Authentication Architecture
Configuration
SpashBI needs be configured in order to use SAML for SSO. The following
are the steps involved in configuring SAML in SplashBI:
Upload the public certificate and private key
Add SplashBI as a Service Provider to IdP
Upload the IdP(Identity Provider) metadata to SplashBI
Upload the public certificate and private key:
This
is an optional step; need this step in case if SplashBI to use your own private
key for encryption. The SplashBI comes with one default private key which can be
used for demo/production (we suggest using your own private key in production).
The X509 certificate can be downloaded from the Certificate Authority provider
or can use tools like keytool and openssl for creating a self-signed
certificate.
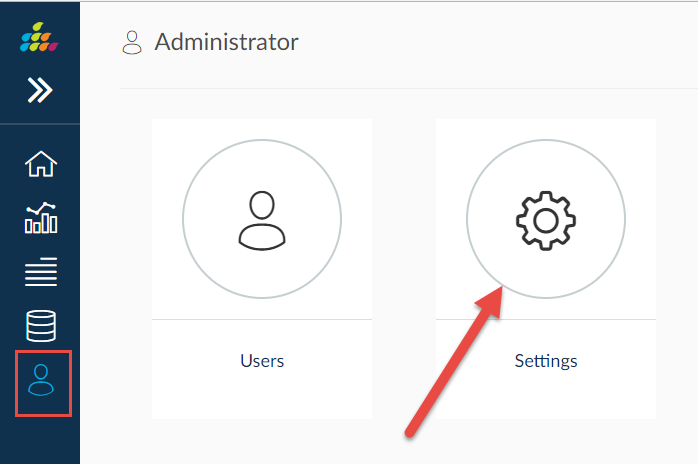
Login to SplashBI with admin user
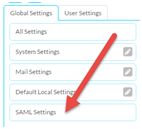
Go to Administrator -> Setting

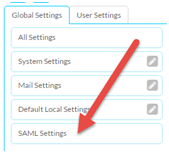
3. Click on SAML Settings
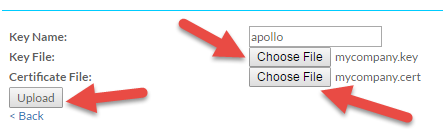
4. Click on Upload Certificate button

5. Enter the inputs; need to select the
.key and .cert files; and click on Upload
Note: The .key file consists of
private key and .cert is a public certificate X.509.
6. Once the certificate is uploaded to server we need
to bounce the web server in which the SplashBI application is deployed. The Key
Name
created in this step can be found in following steps while generating the
Service Provider meta data.
Add a SplashBI as a Service Provider to IdP:
7. Login to SplashBI with admin user
8. Go to Administrator -> Setting
9. Click on SAML Settings
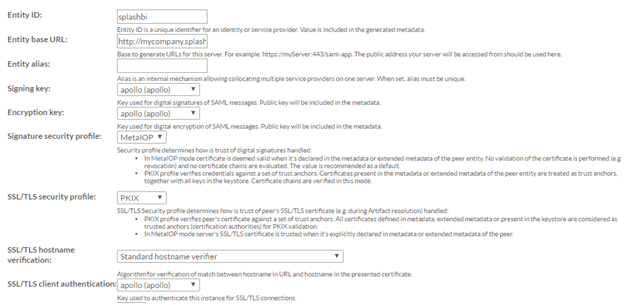
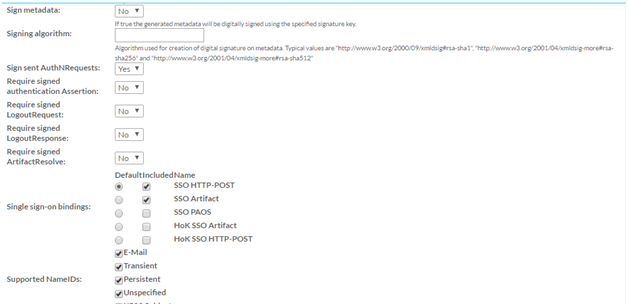
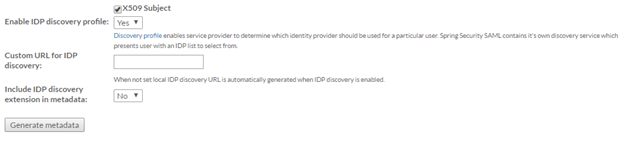
10. Click on Generate Service Provider Metadata
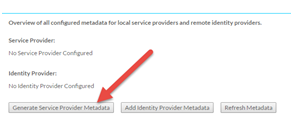
11. Enter the required details as described in the
following screen. Our recommendation is to enter SplashBI for Entity ID.
System automatically generates the Entity base URL.
12. Once the meta-data is generated successfully go
back to find the meta data list
13. From the meta-data list click on the Service
Provider Entity ID to get the meta data XML, and copy / download the meta data
XML
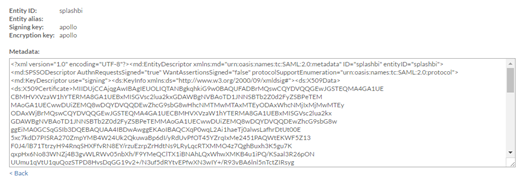
14. Meta data XML need to uploaded to IdP using the
screens / approach defined by your IdP vendor
Upload IdP(Identity Provider)
meta data to SplashBI
We need to add the IdP meta
data to SplashBI describing the system about the IdP that we want to use
for SAML based SSO.
The following steps are involved in doing this:
1. Get the meta-data XML from the IdP vendor
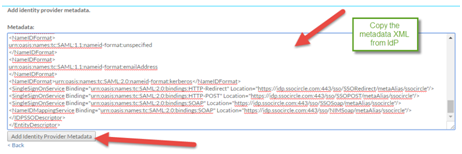
2. Go to SAML Settings as described earlier; and click on Add Identity
Provider Meta data button
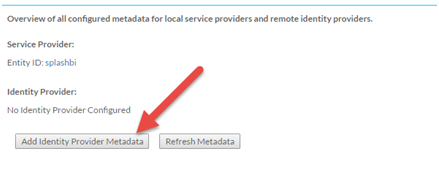
3. Copy the meta data XML provided by the IdP vendor and click Add
Identity Provider
4.
Configuration is complete.
5.Once the user
completes the configuring the SSO with SAML, the user can select SSO during
login to the Splash BI Excel Connect.
6. In the Preference tab the user can set the preference from below screen.
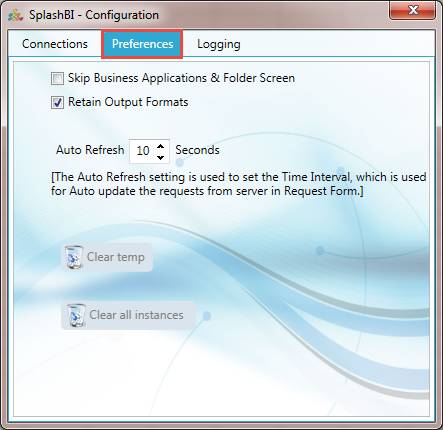
1.Checking the "Skip Business Applications & Groups Screen" will skip the business screen & group screen.
2.Check or un-check the "Retain Output Formats" to apply the formats to the excel ouputs at workbook level. By default it is checked.
3.Can set the auto refresh for requests screen.
4.Click the clear temp button for the temp.
5.Click the clear all instances button for the clearing the instances.
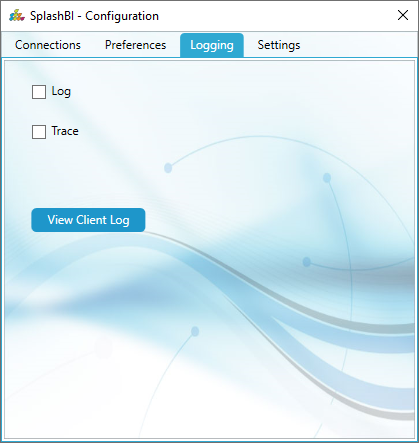
7. In the Logging tab the user can enable the log and view the client log from below screen.